
Exterior Painting Cost: 7 Expensive Mistakes to Avoid
Are you planning to repaint your home’s exterior? Don’t let preventable mistakes drive up your expenses. Many homeowners underestimate the …

Thinking about tackling your home’s exterior paint job all by yourself? Many homeowners see it as a perfect way to save money. However, a successful DIY exterior painting project requires more than just a brush and a dream.
The reality often involves unexpected challenges and hidden costs. Let us walk you through common problems in DIY exterior paint jobs and give you some crucial tips. We aim to help you decide if DIY is right for you or if hiring a professional is the wiser option.

Many enthusiastic DIYers rush through the process and skip sanding, scraping, and cleaning. They see flaking old paint and hope a new coat will cover it. This is one of the most common and costly painting mistakes. Proper prep work is nonnegotiable for a durable finish, especially bare wood requiring a specialized primer.
Skipping steps leads to disastrous long-term consequences. Without a spotless, smooth surface, you get poor paint adhesion. This guarantees premature peeling, bubbling, and cracks on your exterior walls. A new paint job will fail quickly, forcing you to start over.
A critical error is choosing the wrong paint type. Using interior paint on your home’s exterior is a recipe for failure. You must select high-quality exterior paint formulated to withstand sun and rain. This ensures better protection and longevity for your exterior surfaces.
Quality tools are equally important. Cheap brush and roller sets create streaks and uneven coverage. They often shed bristles into your fresh top coat, forcing you to use more paint for a smooth finish. Investing in the right tools is essential for a professional-looking result.
Timing your project is everything. Painting in extreme heat, high humidity, or an impending rain shower spells disaster. These conditions prevent the paint from properly curing and adhering to your exterior walls, leading to a host of visible problems.
The result is often a blotchy, uneven finish or complete paint adhesion failure. The paint may blister in the sun or wash away before it dries. Always aim for dry weather with mild temperatures and low humidity for a flawless, durable exterior paint job.
Painting high areas like second-story walls and eaves introduces serious risk. One misstep while handling a brush or paint can on a ladder can result in severe injury. These dangers are the most compelling reason to hire professional painters:
Professionals apply paint with a systematic technique to ensure durability. They use specific methods to create crisp lines, even when using a contrasting color for trim, and consistent, better coverage across all exterior surfaces. This meticulous approach delivers a lasting, beautiful finish.
DIYers often end up with a patchy, uneven paint job. Missing spots on intricate trim, windows, and doors is easy. These mistakes are glaringly obvious in direct sunlight and significantly detract from your home’s curb appeal and perceived value.
If you proceed with your DIY project, a successful outcome hinges on meticulous preparation and technique. Rushing any step can compromise both safety and the final result. Here are essential painting safety tips to guide your project, from setup to cleanup.
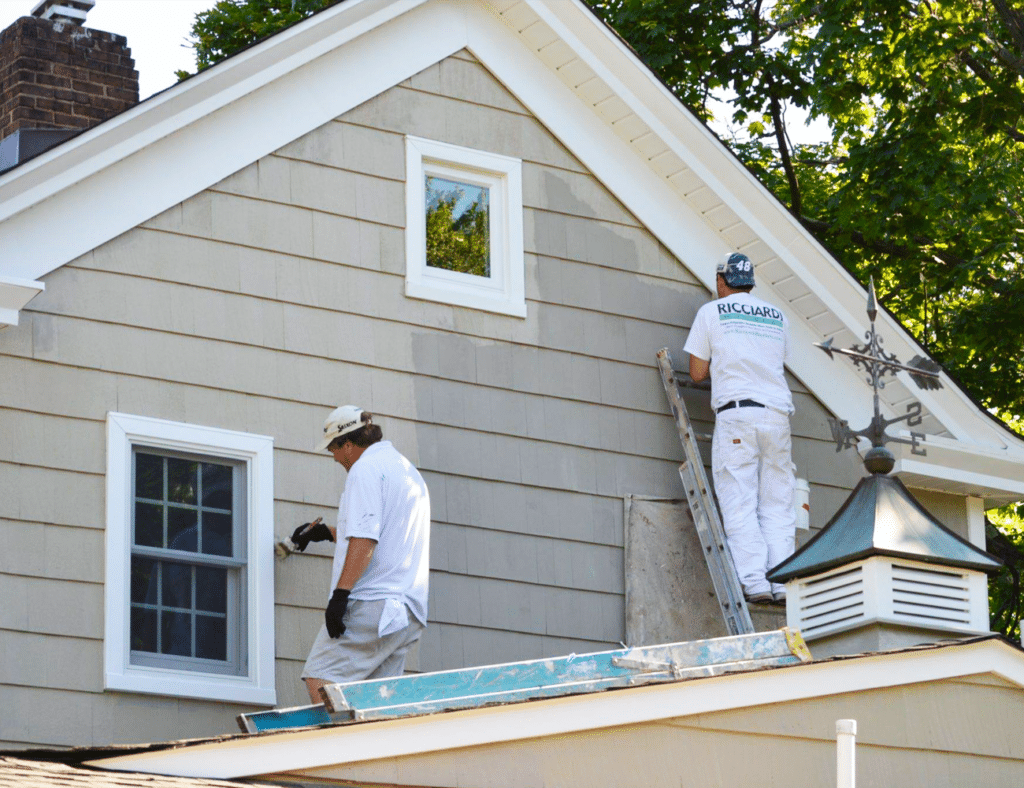
Some DIY exterior painting projects are simply too big or complex. Hiring professional painters is the wisest choice for safety, efficiency, and a guaranteed high-quality result. They have the expertise and equipment to handle any challenge your home’s exterior presents. Consider calling them for:
Professionals complete the job faster, safer, and with materials that ensure lasting beauty. They transform the daunting task of painting a house exterior into a seamless, stress-free experience.
A successful DIY exterior painting project demands significant time, skill, and the right tools. What begins as an attempt to save money can lead to costly corrections and safety risks. Carefully weigh your goals for quality, durability, and safety before committing.
Trust the experts for a guaranteed flawless finish that protects your investment. Contact Storm Guard for a free consultation and trusted guidance.